How to Format an Essay in Microsoft Office
Microsoft Office is one of the two strongest formatting tools on the market. Along with Google Docs, this service is well-deservedly popular among students and is considered one of the most common text editors in the world.
Many students are very familiar with Microsoft Office. Students use only the tool’s basic features without even realizing what depths of writing optimization can be discovered with just a few clicks. If you start using all the features of Microsoft Office 100%, you will start writing an essay many times faster and enjoy the process more.
You no longer have to use the title generator for essay and constantly search the Internet for information about the correct formatting. If you let it, Microsoft Office can do most of the repetitive work.
Tip #1: Explore the Basics
If you are not already familiar with all the features of Microsoft Office, now is the time to start exploring. Take some time to look through all the features and options that are available to you.
Don’t worry about trying to remember everything. The important thing is to get a general sense of everything you can do with Microsoft Office. You can read the official documentation to learn about the service’s basic features. Once you understand the basics well, you can start exploring the more advanced features.
Tip #2: Don’t Forget about AutoCorrect Feature
One of the most valuable parts of Microsoft Office is the AutoCorrect feature. This feature can save you time and effort when formatting your essay. To use the AutoCorrect feature, simply type in the text you want to format and click on the AutoCorrect tab. From there, you can choose to have the text automatically formatted for you.
You can have your text automatically bolded, italicized, or underlined. You can also have your text automatically formatted for headings or bullet points.
Tip #3: Use the MS Office Word Short Keys
If you have not customized the Microsoft Word keyboard shortcuts to your liking, now is the time to do it. Customizing keyboard shortcuts will help you work much faster in the future. You can insert images, create hyperlinks, and format your text without ever reaching for the mouse.
| Ctrl+O | Open a document. |
| Ctrl+N | Create a new document. |
| Ctrl+S | Save the document. |
| Ctrl+W | Close the document. |
| Ctrl+X | Cut the selected content to the Clipboard. |
| Ctrl+C | Copy the selected content to the Clipboard. |
| Ctrl+V | Paste the contents of the Clipboard. |
| Ctrl+A | Select all document content. |
| Ctrl+B | Apply bold formatting to text. |
| Ctrl+I | Apply italic formatting to text. |
| Ctrl+U | Apply underlines formatting to text. |
| Ctrl+E | Center the text. |
Now you can work in Microsoft Word using only your keyboard. This will help you type faster and think about your essay without getting distracted by the tools.
Tip #4: Use the Styles Pane in Microsoft Word
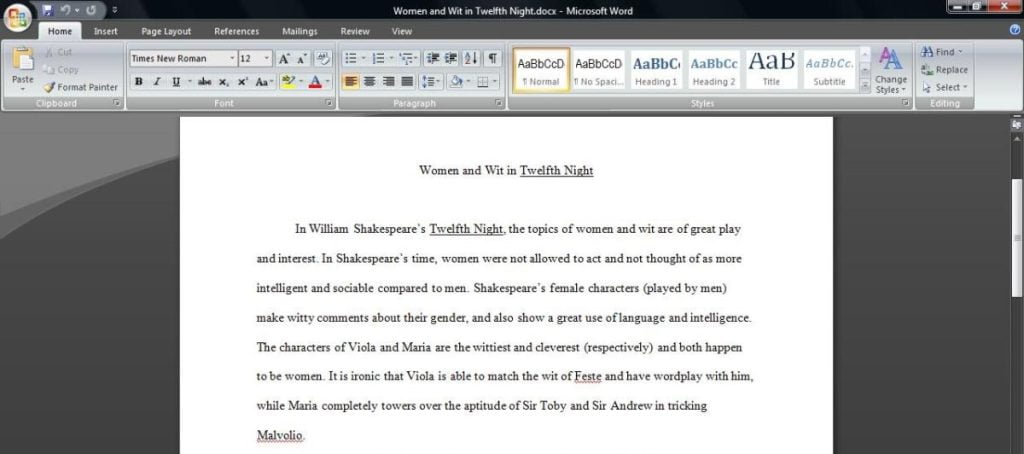
If you want to format your paper quickly and efficiently, the Styles Pane is your best friend. This instrument is usually hidden by default, but you can easily find it by selecting the View tab in the Show group.
The Styles Pane lets you see all the available styles in Microsoft Word and apply them with just one click. This is much faster than manually changing your text’s font, size, and color.
To format your text using the Styles Pane, select the text you want to format. Then, go to the Styles Pane and click on the style you want to apply. The style will be applied to your selected text.
You can also use the Styles Pane to create your styles. To do this, select the text you want to include in your style. Then, go to the Styles Pane, right-click on the style you want to use as a base, and select Modify. Make the changes you wish to in the Modify Style window and click OK. Your new style will be saved, and you can apply it with just one click.
Tip #4: Use the Quick Parts Gallery to Insert Boilerplate Text
The Quick Parts Gallery is an excellent tool for inserting boilerplate text into your essay. Boilerplate text is the text you use often but is not specific to the current document. For example, if you always start your essays with a detailed introduction or end with a particular conclusion, you can save those as Quick Parts.
To insert a Quick Part, go to the Insert tab and click on the Quick Parts button in the Text group. A menu will open with all the Quick Parts you have saved. Click on the one you want to insert, and it will be added to your document at the current cursor position. Your Quick Part will be saved, and you can insert it into any paper with just a few clicks.
Tip #5: Use the Navigation Pane to Move Around Your Document Quickly
The Navigation Pane is excellent for quickly moving around a long document. This page shows you a list of all the headings in your paper. You can click on any title to quickly jump to that section. To open the Navigation Pane, go to the View tab and click on the Navigation Pane button in the Show group.
You can also use the Navigation Pane to search for text in your document. To do this, type the text you want to find in the search box at the top of the pane. The results will be displayed below, with the number of hits for each occurrence. Click on any result to jump to that section.
The Navigation Pane is a great way to move around a document and find the necessary information quickly. These are just a few tips to help you work faster and more efficiently in Microsoft Word. Customizing keyboard shortcuts, using the Styles Pane, inserting Quick Parts, and using the Navigation Pane are all great ways to save time.

