We rely on mobile phones more than ever before. The phone is no longer a tool for making callings or sending messages but becomes an indispensable part of everyone’s life. Your iPhone stores all kinds of data, contacts, photos, messages, songs, work files, etc., you definitely do not want to lose them at any time.
However, unexpected things always happen such as device damaged or even get lost. We cannot stop these accidents but we can take measures to keep the data safe. As long as there’s a copy of iPhone data, we can always restore lost items back to device like nothing ever happened.
Here in this guide, we will tell you 3 iPhone backup ways. The advantages and disadvantages of these three methods will be discussed in detail. You can first read and then choose the method that suits you most.
Backup iPhone with iCloud
iCloud maybe the most familiar backup way for iPhone users. The iCloud makes it easy enough to sync data among iDevices and it also lets users back up data in a few steps. You can complete the backup on device as long as Wi-Fi is connected.
Pros
Support most iPhone data & settings.
Backup can be finished on the device.
Cons
Do not support selective backup & restore.
Ony 5 GB free storage space is provided.
Can’t view the backup files.
Will erase the existing data on device during the restore.
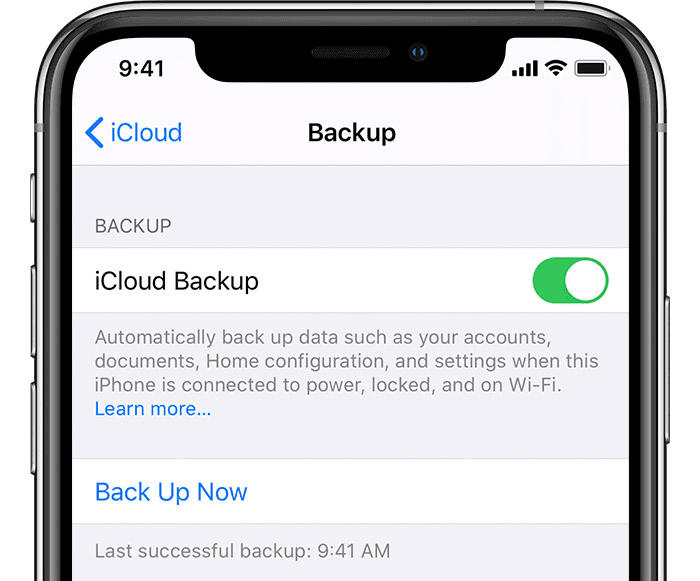
Steps to Backup iPhone with iCloud
Connect your iPhone to a Wi-Fi network.
Open Settings app > Tap [your name] > Tap iCloud.
Turn on iCloud Backup.
Tap Back Up Now option.
Backup iPhone with iTunes
iTunes is another official way to backup iPhone data. You will need to connect iPhone to a computer to make the backup. It’s a good choice if you want to create a backup that is as complete as possible.
Pros
Support most iPhone data & settings.
No Internet connection required.
No backup storage space limitation.
Cons
Do not support selective backup & restore.
Can’t view the backup files.
Will erase the existing data one device during the restore.
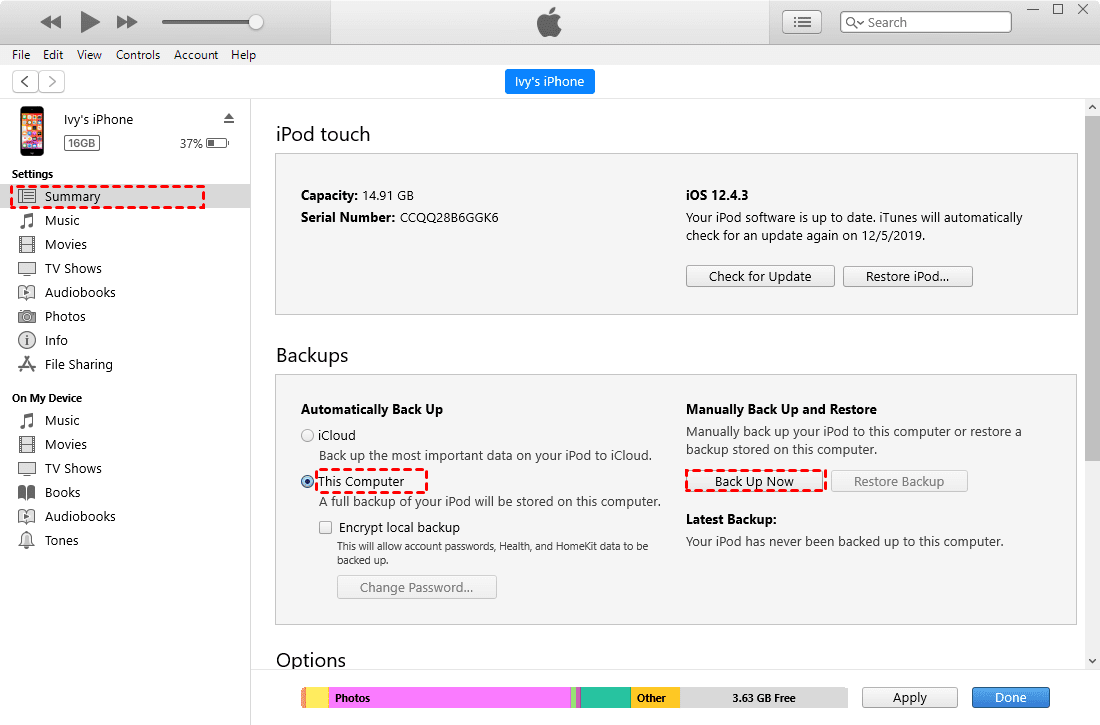
Steps to Backup iPhone with iTunes
Step 1: Download and install the latest version of iTunes on computer.
Step 2: Run iTunes > Connect iPhone to computer via the USB cable.
Note: If this is your first time connecting your iPhone to iTunes, it will ask for your device passcode to trust the computer.
Step 3: Click the Device tab > Click Summary > Select This Computer > Click Back Up Now to start the backup.
Backup iPhone with mBackupper
mBackupper is one free iPhone backup tool that offers a flexible backup solution. It helps users backup the most important iPhone data (contacts, messages, photos, songs, and videos) to computer with amazing speed.
Pros
Easy to use.
No Internet connection required.
Support selective backup & restore.
No backup storage space limitation.
The backup files are accessible and readable.
Will not erase any existed data on device during the restore.
Cons
No Mac version.
Just support a few types of iPhone data.
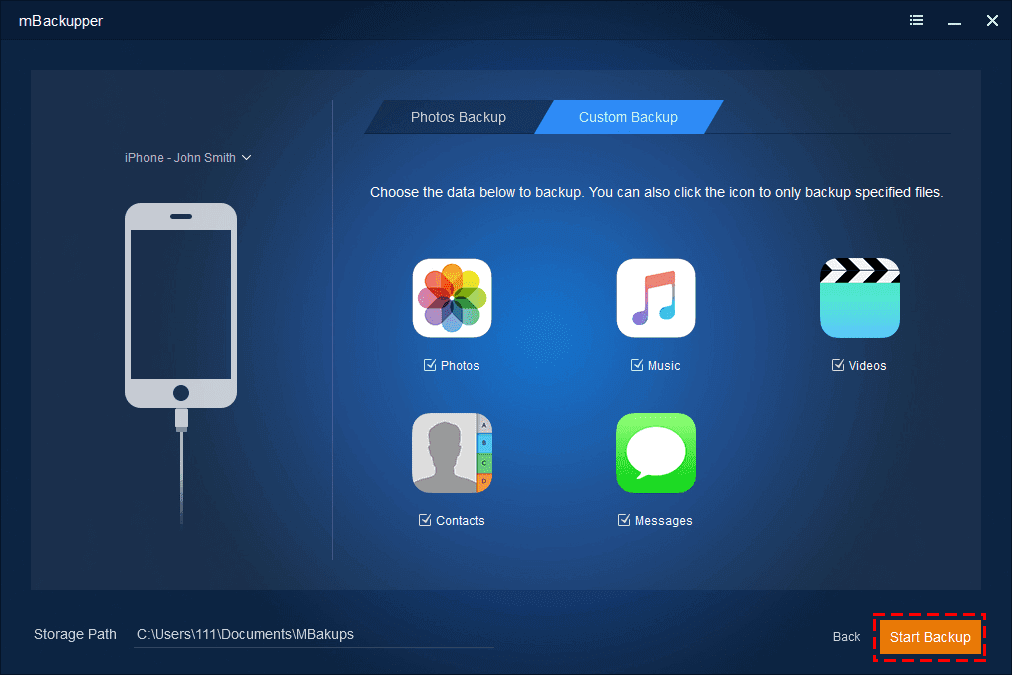
Steps to Backup iPhone with mBackupper
Download, install, and launch mBackupper > Connect your iPhone to computer via USB cable > Tap “Trust” on the iPhone Home screen to give your computer access to your device.
Click Custom Backup option > Choose the type of data you want to backup. You can click the icon to select the items you want to backup.
Select the storage space > Click Start Backup to make it.
Final Words
It’s a wise choice to backup iPhone regularly to ensure data safety. As you can see from the above, these three methods have their pros and cons. You can choose one way to follow according to your needs. Or you may try all these three backup solutions, after all, one more backup is always good.