
How to Manage Disk Partition Safely on Windows 10/8/7?
Description: Learning how to manage disk partition will be quite useful for optimizing computer performance and making the fullest use of the disk storage space. Here come the easy and effective ways to manage disk partition on Windows 10, 8, 7.
Every hard disk drive (HDD), solid-state drive (SSD), USB drive, SD card needs to be partitioned into at least one partition before they can be used to store data on computer. If not, they will show as a piece of unallocated space and cannot be accessed. Generally, most drives are set up with a single partition and the majority of computers just have only one system partition (usually be C: drive). So, some users might need to change the current disk partition structure to make it more reasonable. All in all, learning how to manage disk partition is of great importance.
Benefits of learning to manage disk partitions
Managing disk partitions contain lots of operations. They include resizing partition, creating multiple partitions, formatting partitions, deleting partitions, changing partition drive letter and path, converting disk to MBR partition style or GPT partition style, and more. Each of them can bring different benefits to computer users.
- Resize partition: decrease or increase partition size to make the partition size more reasonable for different storage purpose. For instance, expanding system drive to make OS boot and run faster and smoothly.
- Create multiple partitions: Having more than one partitions can help isolate OS from personal files. Therefore, the personal data can be intact when operating system crashes and needs a reinstallation.
- Format partition: this mainly helps to change the file system to another different one, and helps delete everything from the partition.
- Delete partition: this can make unallocated space, with which you can extend another partition to make two partitions into one finally.
- Convert partition style: MBR and GPT comes with their own advantages. Make a conversion between them can help take advantage of their merits to full utilize your disk.
How to manage disk partition safely?
So, how to perform above operations to control disk partitions? In general, Disk Management (a Windows built-in tool) can help you with all those tasks. But it comes with some limitations and is more likely to cause data loss sometimes, especially when you convert disk from MBR to GPT, or GPT to MBR because it requires you to delete all inside partitions before conversion. Besides, its “Extend Volume” and “Shrink Volume” features only work on NTFS partition, and it can only extend NTFS volume that is followed by an adjacent unallocated space. That’s why most users often find the option is greyed out.
To get around the restriction and manage disk partition more safely and flexibly, it is recommended to use a free partition manager. Among all available disk management freeware, AOMEI Partition Assistant Standard is a standout program. Advanced than Disk Management, it is able to shrink and extend both FAT32 and NTFS partition, extend a partition with non-adjacent unallocated space, convert MBR and GPT without deleting partitions, and more. Here we mainly show how to extend C drive when the available unallocated space is not right behind it.
Applies to: Windows 10, Windows 8.1, Windows 8, Windows 7, Windows XP, Windows Vista
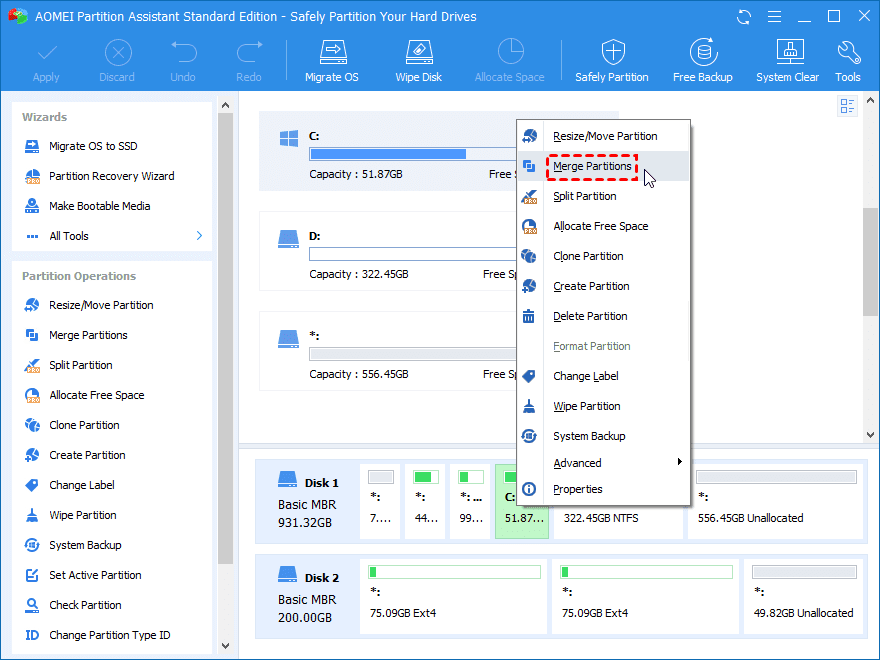
Step 1. Install and run the free software. Right-click the C drive and select “Merge Partition”.
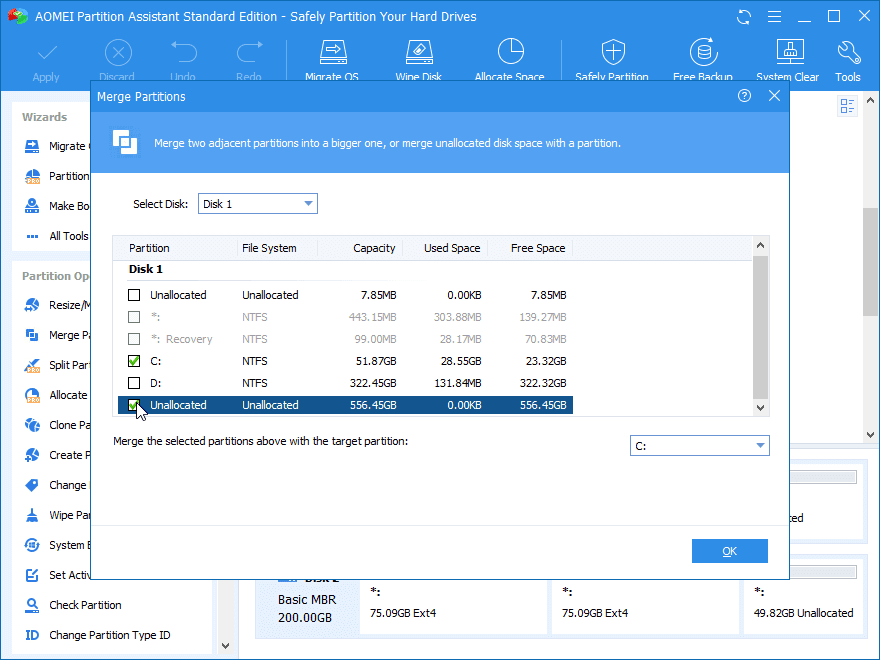
Step 2. In this pop-up window, the C drive has been chosen automatically. Now you need to tick the unallocated space and click “OK”.
Step 3. Back to the main interface, click “Apply” and “Proceed” to commit the pending operation.
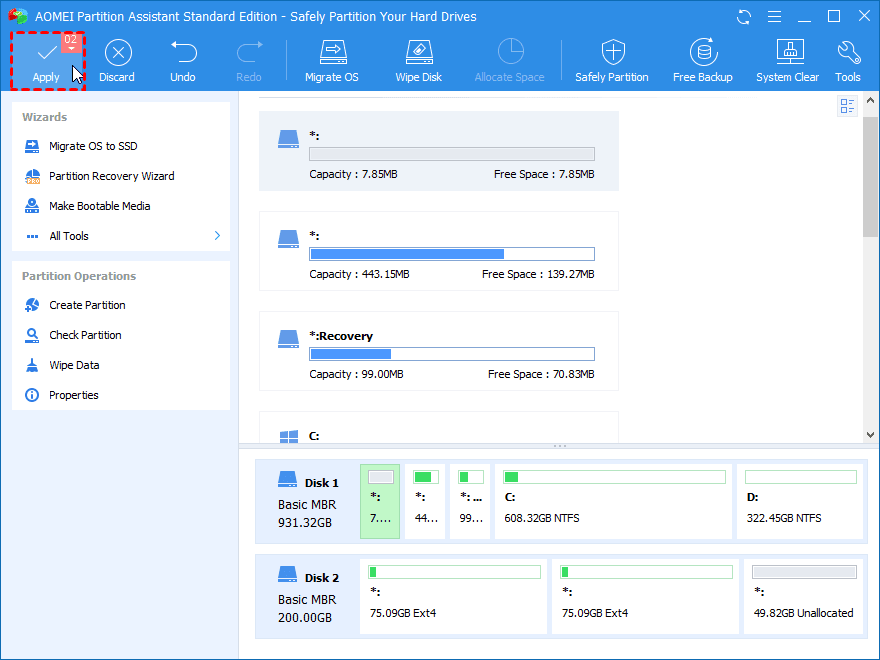
Then the unallocated space will be added into the target partition.
Verdict
So, when it comes to managing disk partition for some specific purpose, you can first try Windows native Disk Management tool. If it fails, the recommended freeware is a nice alternative. Apart from making up the limitations of Disk Management, it also develops many advanced functions like cloning partition, cloning disk, changing file system between FAT32 and NTFS without formatting, wiping hard drive, etc.


